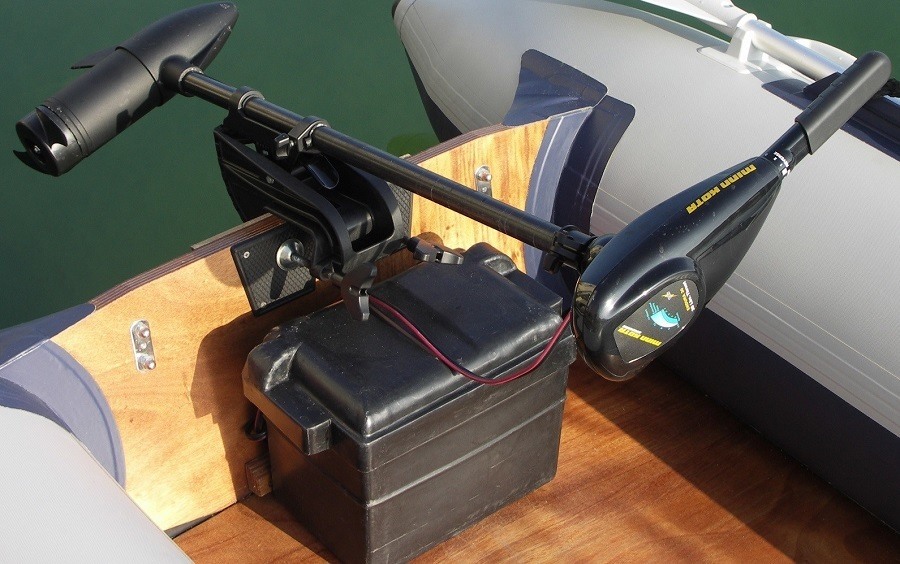
As an inshore angler, it’s very likely that you’ll be relying largely on your trolling motor when you’re fishing. If you rely on it enough, you’re going to run into a situation where it’s going to stop working and hopefully, you won’t be stuck in the middle of a lake with no paddle.
The reason why your trolling motor shorts out isn’t because of the motor itself, but of the trolling motor plug wiring.
In today’s guide, we’re going to give you step by step instructions on how to replace the wiring for a trolling motor plug and the necessary items for this task. By the time you’re finished, you’ll know how to wire a 24-volt trolling motor plug so you can get back out on the water doing what you love most – fishing!
How Does A Trolling Motor Plug Work?
Trolling motor plugs function like plugs you find in your home. There are two components: the plug and the receptacle.
The motor plug will “plug” into the receptacle (much like an electrical outlet in your home), thus allowing electricity to flow freely from the batteries to the motor. When you remove the plug, the electrical connection is broken and you can then remove the motor safely.
What Do I Need To Install A Trolling Motor Plug?
In order to install your new trolling motor plug, you will need:
How To Install The Plug And Receptacle
With all of your tools within reach, now you’re ready to install the plug and the receptacle on your trolling motor. Follow these steps:
Find a surface on the boat where the structure is strong and out of reach of a lot of water. We recommend choosing a vertical surface because water is less likely to get inside the plug or it’s receptacle.
Drill a 1 1/8-inch hole in the surface for the receptacle. 1 1/8-inch is standard size for trolling motor plugs, but you’ll want to check out the instructions for your particular plug just in case the measurements are different than what we state here.
Put the receptacle in the newly drilled hole and use the small holes on the side of the receptacle to mark where the screws will go to hold the receptacle in place. You’ll then want to use the 7/64-inch drill bit to make these holes.
Remove ½-inch of the wire coating on the trolling motor wire that’ll plug into the back of the new receptacle and both the negative and positive power leads from the trolling motor itself.
Connect the trolling motor’s power leads into the male end (the plug) and the battery leads to the female end (the receptacle).
Place the receptacle back in the hole you drilled and use the 7/64-inch screws to hold the receptacle in place.
When you’ve attached the battery leads to the batteries, you will then want to plug the trolling motor plug into the receptacle.
Note: It’s important to note that if your boat already has a plug receptacle, you’ll want to check with the boat dealer (if you’re buying brand new) or the manufacturer of the receptacle already on your boat (if you’ve bought a used boat) to find the matching plug for the already-installed receptacle.
If you cannot contact the manufacturer for one reason or another, you could always remove the old receptacle and use this guide to install a new one. Unfortunately, there isn’t a universal plug design and most trolling motor plugs and receptacles aren’t compatible with one another.
Note 2: If the thought of drilling a hole into your boat scares the living day lights out of you, don’t worry! There are a few other options that you could choose instead. For example, if you wanted to attach a quick-disconnect wire near the trolling motor or in-line with the trolling wire plug, you can find a quick-connect plug.
However, if you have a transom mount motor, we recommend that you consider a quick-connect plug for trolling motors that will attach to the terminals on the circuit breaker and the battery. This will allow you to remove the wiring that’s closest to the battery quickly and easily.
How To Wire A 24-Volt Trolling Motor Plug
Most small and medium sized trolling motors will only require a single 12-volt marine battery, but if you have a larger trolling motor that uses 24-volt or even 36-volt systems, you’ll need one or two more batteries.
When you’re wiring a 24-volt trolling motor, it’s important that you first connect to the circuit breaker (which should only be four inches from the battery. You will want to connect the positive lead of the trolling motor to the positive terminal on the circuit breaker.
From there, connect the negative lead from the circuit breaker to the positive terminal on one of the batteries. Then you’ll want to connect the negative terminal to the positive terminal on the second battery. Finally, connect the negative terminal on the second battery to the negative terminal on the trolling motor.
If you’re using a 36-volt battery, just add another 12-volt battery to the system following the same steps:
Conclusion
Whether you’re installing a new trolling motor plug or you’re replacing an already existing receptacle/plug system, the whole process can feel a little overwhelming. We hope that this guide was able to ease your worries because this is an easy task that can be done in a very short amount of time.
If you have any questions or comments, please leave a comment below.
Resources:


